Made with care and unconditionally loved by our customers, this signature bestseller exceeds all expectations.


The wheels spacer bolts onto the vehicle on the existing studs with the nuts supplied. Your wheel then bolts onto the wheel spacer using the studs on the wheel spacer and your original nuts.
Have a look at http://www.wheel-size.com/size/ to see what size spacer your vehicle use.
NOTE: If you use it on steel rims the studs are too long for the chrome nuts and you have to trim the studs a little bit. It is however no problem with mags.
Notes: Please read full fitment instructions here:
http://www.4x4direct.co.za/blog/fitment-instructions-for-wheel-spacers/
Make sure the surface on the vehicle hub is clean and free from any debris before fitment.
The same applies to the back of the wheel spacer which should be clean.
Tighten all nuts by hand first, then torque in cross over sequence to 30 Nm. Then Torque to 100Nm.
When you have them fitted at a tyre fitment centre, keep an eye on the procedures because they normally tighten it with impact wrench. DO NOT allow them to use an impact wrench and make sure they tighten them in cross over sequence.
Check the wheel spacer nuts after the first 500 km to make sure they are tight. Thereafter check every 5000km.
* The use of thread locker will void the warranty of these wheel spacers
Reason: How do you frequently check the torque if you used thread locker?
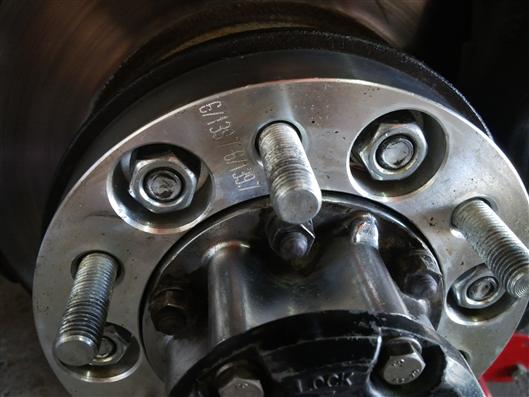
The picture below shows how to fit the wheel spacer to your vehicle
Made in TRC to our specifications
By Piet Petoors (Google +)
Made with care and unconditionally loved by our customers, this signature bestseller exceeds all expectations.